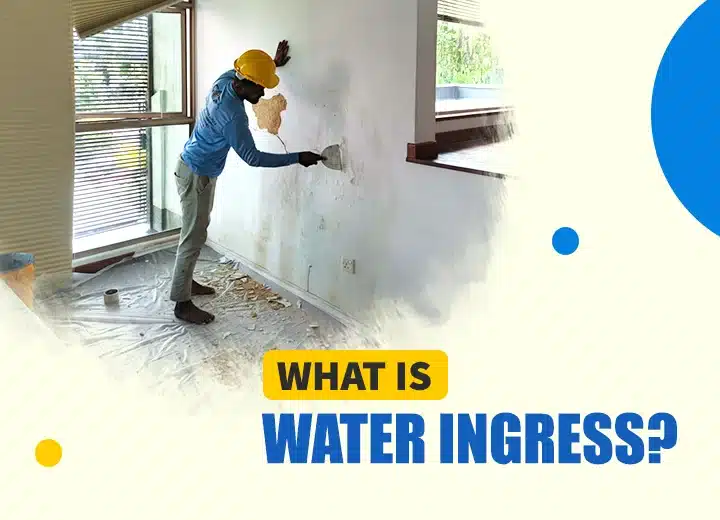

Wall waterproofing (wall water protection) refers to the process of protecting your walls from water damage by creating a barrier. Damp walls develop mould causing respiratory problems and allergic reactions. Water penetration weakens walls reducing their structural strength significantly. Paint peels and plaster crumbles on damp walls requiring expensive repairs. Rising damp pulls groundwater up through walls damaging ground floor rooms. Wall damp-proofing prevents these problems saving money on repairs and redecoration. It improves indoor air quality by eliminating dampness and mould growth. Quality wall water sealing increases property values and makes buildings more attractive.
What is Wall Waterproofing?
Wall waterproofing is applying protective coatings or membranes to walls preventing water from soaking through. Waterproof wall treatment creates barriers that stop rain, moisture and dampness from entering buildings. Damp proofing keeps buildings dry, healthy and safe for occupants.
A study from Science Direct entitled “Impact of surface waterproofing on the performance of brick masonry through the moisture exposure life-cycle” showed that the performance of waterproofing treatments on brick masonry, which is a key component of walls. It highlights the importance of using masonry specimens (brick and mortar together) for evaluating the response of wall systems under moisture exposure. This approach ensures a more accurate assessment of the wall’s hygric behaviour, rather than testing bricks and mortar separately.
What are the Different Types of Wall Waterproofing?
Wall waterproofing types include cementitious, liquid membranes, PU injection, bituminous systems, crystalline coating, acrylic coating, sheet membrane, silicone, epoxy and elastomeric waterproof wall paint. Understanding different types helps select appropriate damp-proofing coating for your specific needs.
1. Cementitious Wall Waterproofing
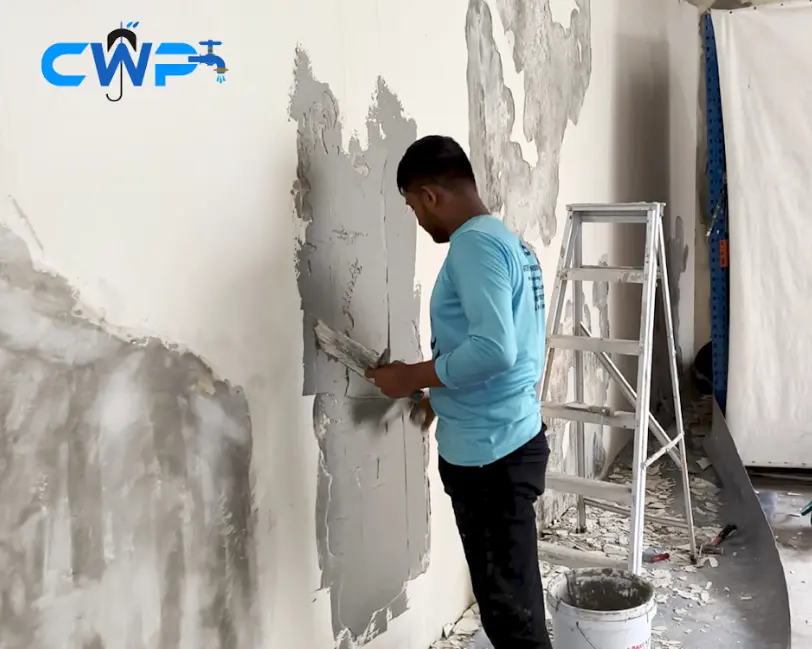
Cementitious wall waterproofing uses cement-based coatings creating waterproof barriers on concrete and masonry walls. It contains waterproof cement, sand and special additives mixed with water. The mixture applies like plaster forming hard protective layers when dry.
A study from Science Direct entitled “Combined effect of rice husk ash and cementitious capillary crystalline waterproofing materials on the performance of mortar” showed that the research investigates the combined use of rice husk ash (RHA) and cementitious capillary crystalline waterproofing (CCCW) materials. The synergy between these materials improves the mechanical properties and impermeability of mortar, enhancing compressive and flexural strength by up to 25%.
Why Use Cementitious Wall Waterproofing?
You should use cementitious wall waterproofing for bathroom walls, basement interiors and water tanks. It provides excellent protection for internal walls facing constant moisture. Cementitious coatings bond strongly to concrete creating permanent waterproof barriers.
2. Liquid Waterproofing Membrane
Liquid waterproofing membrane is a flexible coating applied to walls creating seamless waterproof barriers. It comes as liquid that spreads easily with brushes or rollers. The liquid dries forming rubber-like membranes that stretch without cracking.
A study from ASTM International entitled Water Absorption in Cold Liquid-Applied Waterproofing showed that some cold fluid-applied waterproofing membranes absorb excessive water, leading to deformation known as braining. Testing under different application methods and high-temperature water immersion revealed water absorption beyond CGSB limits, highlighting the importance of proper material selection and application to prevent premature waterproofing failure.
Why Use Liquid Waterproofing Membrane?
You should use liquid waterproofing membrane for walls needing flexible seamless protection. It handles wall movement better than rigid cementitious coatings. Liquid membranes apply easily around complex wall details and penetrations.
3. PU Injection Wall Waterproofing
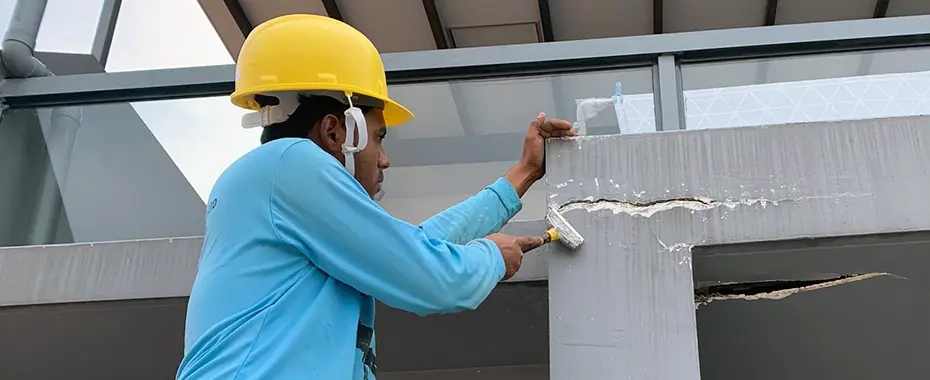
PU injection wall waterproofing pumps expanding polyurethane into wall cracks stopping leaks from inside. It involves drilling holes along cracks and injecting liquid polyurethane under pressure. The polyurethane reacts with moisture in cracks expanding to fill all voids. It works whilst water is actively leaking through walls immediately stopping flow. PU injection avoids expensive external excavation around basement walls. The technique repairs wall cracks quickly with minimal building disruption. Expanding foam creates permanent waterproof seals in concrete and masonry walls.
Why Use PU Injection Wall Waterproofing?
You should use PU injection wall waterproofing for repairing leaking basement and retaining walls. It stops active wall leaks without needing external excavation or hacking. PU injection works from inside buildings avoiding landscape and driveway damage.
A study from Science Direct entitled “Evaluation of polyurethane resin injection for concrete leak repair” showed that evaluates polyurethane resin injection for stopping water leakage in concrete structures. Experimental results show it significantly reduces permeability by expanding within cracks and voids to form a durable seal. Polyurethane injection provides an effective solution for preventing leaks in basements, tunnels, tanks, and other structures.
4. Bituminous Wall Waterproofing
Bituminous wall waterproofing uses tar-like materials creating strong barriers on external basement and foundation walls. It contains bitumen derived from petroleum mixed with fillers and polymers. Bituminous waterproofing comes as liquid coatings or pre-made sheets. The material resists water pressure and soil chemicals excellently underground.
Why Use Bituminous Wall Waterproofing?
You should use bituminous wall waterproofing for external basement and foundation walls. It handles constant groundwater pressure better than most other systems. Bitumen resists soil chemicals that would damage other waterproofing types. The material is economical for large basement wall areas. It provides proven reliable performance used successfully for over a century. Bituminous waterproofing bonds permanently to concrete foundation walls. The tough coating protects walls from water and chemical attack.
A study from Metallurgical and Materials Engineering entitled “Sustainable development in WPCBs treatment for production of bituminous waterproofing materials” showed that Recycling e-waste pyrolysis oil into bitumen produces eco-friendly, water-resistant waterproofing materials. Chemical treatment solidifies the oil, while tests confirm durability, standard compliance, and low toxicity, making it a sustainable solution for high-performance bituminous waterproofing applications.
5. Crystalline Wall Waterproofing
Crystalline wall waterproofing uses chemical treatments that grow crystals inside concrete walls permanently. It contains active chemicals reacting with moisture and cement in concrete. The chemicals form millions of tiny crystals filling all pores and microcracks. Crystals block water whilst allowing concrete walls to breathe naturally. Crystalline waterproofing becomes part of the concrete wall structure permanently. It continues working even if you damage the surface later. The crystals keep growing whenever water touches concrete sealing new cracks.
Why Use Crystalline Wall Waterproofing?
You should use crystalline wall waterproofing for concrete basement and retaining walls. It provides permanent waterproofing that lasts the wall’s lifetime. Crystalline treatments work on both new and existing concrete walls. The method waterproofs from either positive or negative side effectively. It suits walls where external waterproofing is impossible to access.
A study from the International Research Journal of Engineering and Technology (IRJET) entitled “Analysis of Integral Crystalline Waterproofing Technology for Concrete“, showed that Concrete is durable but naturally porous, making it vulnerable to moisture and chemical damage that can weaken structures. Traditional coatings often fail over time. Crystalline waterproofing offers a long-term solution by penetrating concrete, sealing pores, and forming insoluble crystals that enhance durability and structural protection.
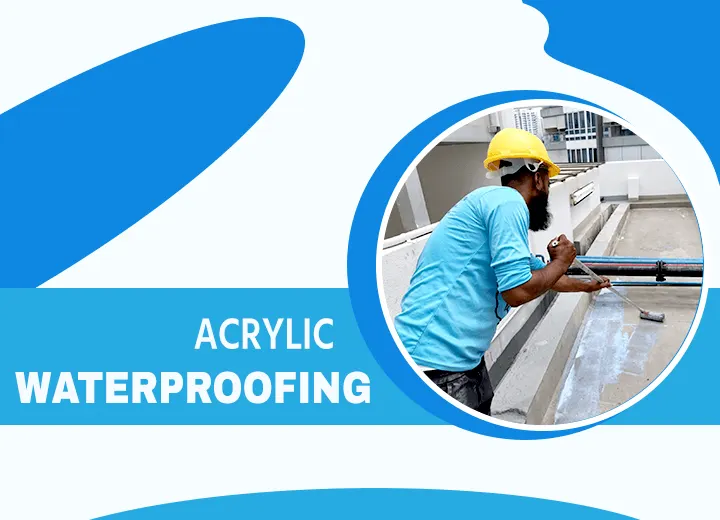
6. Acrylic Wall Waterproof Coating
Acrylic wall waterproof coating is a flexible paint-like material protecting walls from rain and moisture. It contains acrylic polymers creating water-resistant barriers when dry. This coatings apply easily with brushes or rollers like regular paint. The coating is breathable allowing moisture vapour to escape from walls.
Why Use Acrylic Wall Waterproof Coating?
You should use acrylic wall waterproof coating for external walls needing economical protection. It provides adequate waterproofing for walls facing moderate rainfall only. Acrylic coatings enhance wall appearance whilst protecting against moisture. The material is easy to apply making it suitable for DIY projects.
A study from Trans Tech Publications Ltd.integrated into the Scientific.Net website entitled “Influence of Acrylic Emulsion on Polymer-Cement Waterproof Coating” showed that the effects of polymer-cement ratio (0.12), glass transition temperature (Tg), and functional monomers on polymer cement mortar properties. The results show that tensile strength and elongation depend on Tg, differential Tg, and monomer amounts, with optimal properties at a low P/C ratio.
7. Sheet Membrane Wall Waterproofing
Sheet membrane wall waterproofing uses pre-manufactured waterproof sheets stuck to wall surfaces. The sheets are made from bitumen, PVC, HDPE or rubber materials. Workers unroll sheets vertically on walls overlapping all joints properly. Sheets stick down using adhesive, heat welding or mechanical fixings. Sheet membranes create complete waterproof barriers on large wall areas. They work excellently on basement external walls and retaining walls. Pre-made sheets ensure consistent quality and reliable waterproof performance.
Why Use Sheet Membrane Wall Waterproofing?
You should use sheet membrane wall waterproofing for large basement and retaining walls. Sheets provide faster installation than liquid coatings on big areas. The pre-made quality ensures consistent waterproofing performance throughout. Sheet membranes handle high water pressure excellently underground. They resist soil chemicals and root penetration effectively. Installation is faster saving labour costs on large projects. Sheet waterproofing lasts 20 to 25 years with proper installation.
8. Silicone-Based Wall Waterproofing
Silicone-based wall waterproofing uses silicone compounds creating water-repellent barriers on wall surfaces. It penetrates into porous walls or forms thin protective coatings. Silicone waterproofing makes water bead up and roll off walls. The treatment is invisible maintaining the wall’s natural appearance. Silicone resists UV damage and weathering excellently for many years. It works on brick, stone, concrete and rendered walls effectively. Silicone-based waterproofing is breathable allowing walls to dry naturally.
Why Use Silicone-Based Wall Waterproofing?
You should use silicone-based wall waterproofing for protecting external walls invisibly. It maintains the wall’s natural appearance without changing colour. Silicone provides excellent UV resistance lasting 10 to 15 years. The breathable treatment prevents moisture trapping inside walls. It repels water whilst allowing walls to dry from inside. Silicone waterproofing suits heritage buildings needing invisible protection. The treatment is easy to apply and maintains wall aesthetics.
9. Epoxy Waterproof Coating
Epoxy waterproof coating is a two-part chemical-resistant material creating extremely strong wall barriers. It contains epoxy resin and hardener mixed together before application. Epoxy forms hard rigid coatings resisting chemicals, abrasion and water completely. The coating bonds to concrete, metal and most wall materials permanently. Epoxy waterproof coating is perfect for industrial walls facing harsh conditions. It provides the strongest most durable wall waterproofing available. However, epoxy is rigid and cracks if walls move significantly.
Why Use Epoxy Waterproof Coating?
You should use epoxy waterproof coating for industrial and chemical facility walls. It resists acids, alkalis, solvents and petroleum products excellently. Epoxy provides superior strength and durability in harsh environments. The coating handles heavy mechanical loads and impacts well. It works in extreme temperatures where other coatings fail. Epoxy creates permanent rigid waterproof barriers on stable walls. The ultimate performance justifies higher costs for demanding applications.
10. Elastomeric Waterproof Wall Paint
Elastomeric waterproof wall paint is a thick flexible coating that stretches covering wall cracks. It contains elastic polymers allowing 300% to 400% elongation without breaking. Elastomeric paint bridges hairline cracks preventing water penetration through walls. The thick coating fills small imperfections creating smooth waterproof surfaces. It is available in various colours providing decorative waterproof finishes. Elastomeric paint works on masonry, concrete and rendered exterior walls. The flexible coating accommodates wall movement from temperature changes.
Why Use Elastomeric Waterproof Wall Paint?
You should use elastomeric waterproof wall paint for external walls with minor cracks. It bridges hairline cracks preventing water entry without repairs. The thick flexible coating handles thermal expansion and contraction well. Elastomeric paint provides good UV resistance lasting 8 to 12 years. It offers decorative waterproofing combining protection with attractive finishes.
A stud from The Association for Materials Protection and Performance (AMPP) entitled “Elastrometric Acrylic Coatings for Use on Commercial Structures” showed that Elastomeric acrylic coatings, based on low VOC acrylic latex binders, offer flexibility, UV and water resistance, and durability for commercial and residential buildings. Used on roofs, masonry walls, and EIFS, these coatings provide excellent performance in various environmental conditions.
Why Do You Need Wall Waterproofing?
Wall waterproofing protects your house from all water damage and leaks completely. It stops rain from entering walls and keeps them dry always now. Your family stays healthy because mould cannot grow on protected walls ever. The walls stay strong and beautiful for many long years ahead. You save lots of money because you don’t repair walls again repeatedly. Waterproofing keeps your home safe, clean and lovely for your entire family.
Is Wall Waterproofing Better Than Water-Repellent Paint?
Yes, waterproofing works much better always. When comparing water-repellent and waterproof solutions, waterproof treatment completely blocks water and keeps walls fully dry.. Water-repellent paint only slows down water but cannot stop it fully ever. Heavy rain goes through water-resistant paint and damages your walls badly over time. Waterproofing lasts for many years but paint needs reapplying every few years. Waterproofing protects deep inside walls whilst paint only covers the surface area.
Wall waterproofing saves you more money in the long run for sure. It stops all leaks, cracks and damp problems that ruin your home completely. Water-resistant paint looks nice but fails when heavy rains come down hard. Professional waterproofing gives you complete protection and peace of mind always now. Your walls stay strong, dry and safe for your family every single day. Choose waterproofing over paint for the best protection against water damage today.
Which Walls Require Waterproofing?
External walls, basement walls, bathroom walls, kitchen walls, retaining walls, internal walls with plumbing lines, walls with visible cracks, service yard and utility area walls, and party or shared walls requires waterproofing service.
- External Walls
External walls are the outside walls of your house that face weather. Rain, wind and sun hit these walls every single day of year. These walls protect your home from bad weather and keep you safe. You should waterproof external walls because rain soaks into them very easily. Water makes walls weak and causes cracks that grow bigger each day. Damp walls grow green mould that looks dirty and smells very bad.
- Basement Walls
Basement walls are underground walls that touch wet soil all the time. These walls face water pressure from soil and rain every single day. Water pushes against basement walls and tries to enter your home constantly. You should waterproof basement walls because they get damp very quickly always. Wet basements smell bad and grow dangerous mould that makes you sick. Water ruins everything you store in the basement like boxes and furniture.
- Bathroom Walls
Bathroom walls are walls inside your bathroom that get wet every day. Water from showers, baths and sinks splashes on these walls all time. Steam and moisture make bathroom walls damp even when not using water. You should waterproof bathroom walls because water damages them very fast always. Wet walls grow black mould in corners that looks horrible and dirty. Water seeps through walls and damages rooms next to your clean bathroom.
- Kitchen Walls
Kitchen walls are walls near your sink, stove and cooking areas daily. Water splashes on these walls when you wash dishes and cook food. Steam from cooking makes walls damp and sticky over time every day. You should waterproof kitchen walls because they face water and grease constantly. Damp walls attract insects and pests that hide in cracks and holes. Water stains make kitchen walls look dirty even after you clean them.
- Retaining Walls
Retaining walls are strong walls that hold back soil in your garden. These walls face huge pressure from wet soil pushing against them daily. Rainwater collects behind retaining walls and makes soil very heavy and damp. You should waterproof retaining walls because water pressure can break them apart. Wet soil pushes harder and can make walls crack and fall down. Water damage makes retaining walls weak and dangerous for your home’s safety.
- Internal Walls with Plumbing Lines
Internal walls with plumbing lines have water pipes hidden inside them daily. These pipes carry water to bathrooms, kitchens and all rooms in house. Sometimes pipes leak or burst and water damages walls from the inside. You should waterproof these walls because pipe leaks cause serious damage secretly. Water from leaking pipes creates damp patches that grow mould very fast. Wet walls become weak and can collapse if leaks continue for long.
- Walls with Visible Cracks
Walls with visible cracks have lines and gaps that you can see. These cracks happen because walls get old or house foundations move slightly. Rain enters through cracks and damages walls from inside very badly quickly. You should waterproof cracked walls because water makes cracks grow much bigger. Water freezes in winter and breaks walls apart from the inside out. Cracks let insects and pests enter your home and cause more problems.
- Service Yard and Utility Area Walls
Service yard and utility area walls are in spaces where you wash. These areas have washing machines, water taps and drainage systems running daily. Lots of water splashes and flows in these areas every single day. You should waterproof these walls because they face constant water exposure always. Wet walls in service yards develop stains and look dirty very quickly. Water damages electrical connections and creates safety risks for your entire family.
- Party Walls or Shared Walls
Party walls or shared walls are walls between two houses or flats. These walls belong to both neighbours and both families use them daily. Water problems on one side can affect the other neighbour’s home badly. You should waterproof party walls because leaks travel between both homes quickly. Damp from one house spreads through shared walls to your home. Water damage causes arguments between neighbours about who pays for costly repairs.
When Should You Apply Wall Waterproofing?
You should apply wall waterproofing during new construction to prevent future water problems developing. Use Wall water resistance treatment immediately when you notice water seepage or dampness appearing. Apply after heavy rain or flooding that has exposed waterproofing weaknesses. Waterproof walls when cracks appear allowing water potential entry points. Basement and retaining walls always need waterproofing from the start. High-humidity areas benefit from preventive wall waterproofing protecting against moisture damage.
- During New Construction
During new construction is the best time to apply wall anti-leak treatment economically and effectively. Workers can access all wall surfaces easily before finishing materials cover them. External basement walls receive waterproofing before backfilling with soil. Internal bathroom walls get waterproofing before installing tiles and fixtures. Foundation walls are treated during construction preventing future groundwater problems. New construction waterproofing costs less than retrofitting existing buildings later. The waterproofing integrates perfectly with the building structure from the start.
- Before Painting or Renovation
Before painting or renovation you should apply wall waterproofing to protect your investment. Waterproofing prevents moisture damaging new paint and decorations quickly. It stops water stains bleeding through freshly painted walls ruining appearance. Renovation provides opportunity to address hidden water problems properly. Workers can access walls easily whilst removing old finishes. Waterproofing now avoids expensive redecoration in few years. The protection ensures renovations last their expected lifespan fully.
- When You Notice Water Seepage
When you notice water seepage through walls you should apply waterproofing immediately. Water seepage appears as damp patches, stains or actual water droplets. It indicates waterproofing has failed or never existed properly. Early treatment prevents seepage damaging wall structures and finishes. Small seepage problems quickly become major leaks without intervention. Ignoring seepage leads to mould growth and health problems. Immediate waterproofing stops damage spreading and costs increasing exponentially.
- After Heavy Rain or Flooding
After heavy rain or flooding you should inspect and waterproof vulnerable walls. Extreme weather exposes waterproofing weaknesses that normal conditions hide. Flooding saturates walls potentially damaging existing waterproofing systems. Heavy rain reveals leaks needing immediate waterproofing attention. Post-flood waterproofing prevents recurring problems during future weather events. It addresses damage before walls dry allowing proper assessment. Emergency waterproofing protects buildings whilst planning permanent solutions.
- When Cracks Appear on Walls
When cracks appear on walls you should apply waterproofing preventing water entry. Cracks create pathways for water to penetrate through walls. Even hairline cracks allow moisture causing dampness and damage. Structural cracks widen over time letting more water through. Thermal movement cracks appear from temperature expansion and contraction. Waterproof plaster or injection seals cracks before water problems develop. Early crack waterproofing prevents expensive repairs and structural damage.
- For Basement and Retaining Walls
For basement and retaining walls you should apply waterproofing as standard practice. These walls face constant groundwater pressure requiring strong waterproofing. Basements sit below ground where water collects naturally. Retaining walls hold back soil and moisture constantly. Without waterproofing, basements flood and walls seep continuously. Waterproofing is essential not optional for these wall types. Professional basement waterproofing prevents flooding, dampness and structural problems.
- In High-Humidity Areas
In high-humidity areas you should apply preventive wall waterproofing. Constant high humidity causes condensation on walls leading to dampness. Coastal areas face humidity and salt exposure damaging walls. Tropical climates maintain high humidity year-round promoting mould growth. A study from Emerald Insight, entitled “Waterproofing integrity and water tightness of buildings in the tropic,” showed that frequent heavy rain, very high humidity and intensive water use in toilets/bathrooms lead to rapid failure of conventional waterproofing details copied from temperate countries.
How Do You Do Wall Waterproofing?
You do wall waterproofing by following systematic steps ensuring proper surface preparation and application.
Step 1: Inspect and Assess the Wall
Examine the entire wall surface thoroughly, Identify cracks, holes and damage needing repair. Check for existing moisture or active leaks. Determine wall material type and condition. Assess accessibility and working conditions. Measure the wall area needing waterproofing.
Step 2: Select Appropriate Waterproofing Method
Choose waterproofing type based on wall location. Consider internal or external wall position. Assess water exposure level and pressure. Select materials suitable for wall material. Plan for wet or dry application conditions. Consider budget and longevity requirements.
Step 3: Prepare the Wall Surface
Clean the wall removing all dirt and debris. Remove loose paint, plaster or damaged material. Repair cracks and holes with suitable filler. Fill gaps around pipes and penetrations. Ensure wall surface is sound and stable. Let repaired areas cure completely
Step 4: Apply Primer if Required
Check if waterproofing system needs primer. Apply primer coat evenly across wall. Follow manufacturer’s drying time recommendations. Primer improves waterproofing adhesion significantly. Ensures better bonding to wall surface. Let primer dry completely before waterproofing.
Step 5: Apply First Waterproofing Coat
Mix waterproofing material according to instructions. Apply first coat evenly using appropriate tools. Cover entire wall area completely. Pay extra attention to corners and edges. Ensure even thickness throughout application. Avoid gaps or thin spots anywhere.
Step 6: Add Reinforcement Where Needed
Place reinforcement mesh or tape over joints. Apply whilst first coat is still wet. Cover corners, cracks and junctions thoroughly. Embed reinforcement completely in waterproofing. Smooth out any air bubbles or wrinkles. Reinforcement prevents crack formation
Step 7: Apply Additional Coats
Wait for first coat to become touch-dry. Apply second coat in opposite direction. Build up to recommended total thickness. Most systems need 2 to 3 coats minimum. Let each coat dry before next application. Check coverage and thickness regularly
Step 8: Cure and Protect
Allow full curing time as specified. Keep waterproofing moist during curing if needed. Protect from rain, sun or damage. Avoid traffic on treated walls. Follow manufacturer’s curing recommendations. Proper curing ensures maximum strength.
Step 9: Test and Inspect
Inspect completed waterproofing carefully. Check for any gaps, thin spots or defects. Perform water testing if appropriate. Repair any problems immediately. Ensure complete coverage achieved. Verify waterproofing meets standards.
Step 10: Apply Finish Materials
Install tiles, renders or paint as designed. Protect waterproofing during finishing work. Follow compatible finishing material recommendations.. Waterproofing accepts most finishes when cured. Complete project to specifications. Provide care and maintenance instructions.
How Do You Waterproof Basement Walls?
You waterproof basement walls using external or internal methods depending on access.
1. How Do You Waterproof External Basement Wall?
Step 1: Excavate Around Basement
- Dig soil away from basement walls
- Expose entire wall height down to footings
- Ensure safe excavation with proper shoring
- Remove all soil from wall surface
- Plan for drainage installation
- Protect against excavation collapse
Step 2: Clean and Prepare Walls
- Clean walls removing all dirt and debris
- Repair cracks and damaged concrete
- Remove old deteriorated waterproofing completely
- Let walls dry if possible
- Ensure sound stable wall surface
- Fill major holes and gaps
Step 3: Apply Waterproofing System
- Apply bituminous coating or membrane
- Start from bottom working upward
- Overlap sheets properly if using membranes
- Ensure complete coverage with no gaps
- Pay attention to wall-footing junction
- Build up recommended thickness
Step 4: Install Protection and Drainage
- Install protection board over waterproofing
- Place drainage pipe at footing level
- Add gravel around drainage pipe
- Install geotextile fabric over gravel
- Ensure drainage slopes away from building
- Protection prevents waterproofing damage
Step 5: Backfill Carefully
- Backfill soil carefully avoiding damage
- Compact soil in layers properly
- Slope ground away from building
- Ensure no sharp objects damage waterproofing
- Complete landscaping appropriately
- Monitor for settlement over time
2. How Do You Waterproof Internal Basement Wall?
Step 1: Assess and Prepare Walls
- Inspect walls identifying leak points
- Mark all cracks and damp areas
- Clean walls thoroughly
- Remove paint or coatings if required
- Repair surface damage
- Ensure walls are accessible
Step 2: Inject Active Leaks
- Use PU injection for flowing leaks
- Drill holes along cracks
- Inject expanding polyurethane foam
- Stop active water immediately
- Seal injection holes after curing
- Test leaks have stopped
Step 3: Apply Internal Waterproofing
- Use cementitious or crystalline waterproofing
- Apply to clean prepared walls
- Build up multiple coats
- Ensure complete coverage
- Pay attention to floor-wall junction
- Let cure properly between coats
Step 4: Install Drainage System
- Install internal drainage channel if needed
- Connect to sump pump
- Ensure proper slope to drain
- Collect any residual water
- Pump water away from building
- Test system operates correctly
Step 5: Finish Walls
- Apply render or drywall as designed
- Protect waterproofing during finishing
- Ensure good ventilation
- Monitor for any moisture return
- Complete decoration as planned
- Provide maintenance instructions
How Do You Waterproof Shower Walls?
You waterproof shower walls before installing tiles creating complete wet area protection.
Step 1: Prepare Shower Area
- Remove old tiles and damaged material
- Expose wall substrate completely
- Check substrate is sound and stable
- Replace damaged substrate if needed
- Ensure walls are plumb and level
- Clean all dust and debris
Step 2: Install Waterproof Substrate
- Install cement board or waterproof backing
- Fix securely to wall studs
- Ensure boards are level and plumb
- Tape all board joints properly
- Create solid stable base
- Check corners are square
Step 3: Seal Joints and Corners
- Apply waterproof tape to all joints
- Seal internal corners thoroughly
- Cover external corners properly
- Seal floor-wall junctions carefully
- Use quality waterproof tapes
- Ensure no gaps exist
Step 4: Apply Primer Coat
- Prime substrate if required
- Apply evenly across all surfaces
- Let primer dry completely
- Primer improves waterproofing adhesion
- Follow product recommendations
- Ensure complete coverage
Step 5: Apply First Waterproofing Coat
- Mix waterproofing according to instructions
- Apply first coat to walls
- Use brush or roller evenly
- Cover entire shower area
- Height minimum 1800mm on shower walls
- Extend beyond shower zone 150mm
Step 6: Embed Reinforcement
- Place reinforcement tape over joints
- Apply whilst waterproofing is wet
- Embed completely without air bubbles
- Cover all corners and junctions
- Smooth out wrinkles carefully
- Ensure good adhesion
Step 7: Apply Second Coat
- Wait for first coat to dry
- Apply second coat perpendicular to first
- Ensure even thickness throughout
- Cover all areas completely
- Pay attention to corners
- Build up minimum 2mm total thickness
Step 8: Apply Third Coat
- Apply third coat for complete protection
- Check no thin spots exist
- Ensure corners well covered
- Verify recommended thickness achieved
- Smooth finish for tile application
- Let cure completely
Step 9: Test Waterproofing
- Perform flood test if possible
- Spray water checking for leaks
- Inspect all corners and joints
- Verify complete waterproof barrier
- Repair any defects immediately
- Ensure system is watertight
Step 10: Install Tiles
- Use flexible tile adhesive
- Install tiles over cured waterproofing
- Maintain waterproofing integrity
- Use waterproof grout
- Seal joints around fixtures
- Complete shower installation
How Do You Waterproof Wall Panels for Bathroom?
You waterproof wall panels for bathroom by sealing joints and applying protective treatments. A study from Emerald Insight, entitled “Waterproofing integrity and water tightness of buildings in the tropic”, showed that frequent heavy rain, very high humidity and intensive water use in toilets/bathrooms lead to rapid failure of conventional waterproofing details copied from temperate countries.
Step 1: Select Appropriate Wall Panels
- Choose waterproof or water-resistant panels
- PVC panels work excellently in bathrooms
- Acrylic panels resist moisture well
- Laminated boards need edge sealing
- Select panels designed for wet areas
- Ensure quality suitable for bathrooms
Step 2: Prepare Wall Surface
- Clean walls thoroughly
- Repair any damage or unevenness
- Ensure walls are dry
- Install battens if required
- Create level fixing surface
- Mark panel positions
Step 3: Apply Waterproofing to Substrate
- Waterproof wall substrate before panels
- Use liquid membrane or coating
- Apply to shower and sink areas
- Ensure complete substrate protection
- Let waterproofing cure fully
- Provides backup protection
Step 4: Install Wall Panels
- Cut panels to size accurately
- Start from bottom working upward
- Use manufacturer’s fixing system
- Ensure panels are level
- Leave expansion gaps as specified
- Avoid over-tightening fixings
Step 5: Seal All Joints
- Apply silicone sealant to panel joints
- Use bathroom-grade silicone
- Tool sealant for smooth finish
- Seal internal and external corners
- Ensure no gaps exist anywhere
- Sealant prevents water penetration
Step 6: Seal Panel Edges
- Seal cut panel edges carefully
- Apply silicone to exposed edges
- Prevent water wicking into panels
- Pay attention to bottom edges
- Seal around penetrations
- Complete edge protection
Step 7: Install Trim and Finishes
- Install corner trims properly
- Seal behind trims with silicone
- Fit edge trims neatly
- Ensure water cannot enter behind
- Create professional finish
- Protect all panel edges
Step 8: Seal Fixtures and Fittings
- Seal around shower fixtures
- Waterproof tap penetrations
- Seal shelf and accessory fixings
- Use flexible waterproof sealants
- Ensure complete sealing
- Test no water can enter
Step 9: Test Installation
- Spray water on panels
- Check no leaks at joints
- Verify sealant effectiveness
- Inspect all corners and edges
- Ensure water runs off properly
- Repair any problems immediately
Step 10: Maintain Sealant
- Inspect sealant regularly
- Replace deteriorated sealant
- Keep joints sealed properly
- Clean panels appropriately
- Maintain waterproof integrity
- Ensure long-lasting protection
How Do You Waterproofing Concrete Block Walls Outside?
You waterproof concrete block walls outside using appropriate exterior coatings or membranes.
Step 1: Inspect Wall Condition
- Examine entire wall surface
- Identify cracks and damage
- Check for loose or damaged blocks
- Assess mortar joint condition
- Note areas needing repair
- Plan waterproofing approach
Step 2: Repair Damaged Areas
- Replace any loose or damaged blocks
- Repoint deteriorated mortar joints
- Fill large cracks with mortar
- Repair spalling or broken blocks
- Let repairs cure properly
- Create sound stable wall surface
Step 3: Clean Wall Thoroughly
- Power wash wall removing all dirt
- Remove loose paint or coatings
- Clean out joints and cracks
- Eliminate biological growth
- Let wall dry completely
- Ensure clean surface
Step 4: Apply Primer
- Use masonry primer appropriate for blocks
- Apply evenly to entire wall
- Work primer into surface
- Fill surface pores partially
- Improve waterproofing adhesion
- Let primer dry completely
Step 5: Seal Cracks and Joints
- Fill hairline cracks with flexible sealant
- Seal control joints properly
- Use appropriate crack filler
- Ensure complete crack sealing
- Smooth sealant finishes
- Prevent water entry points
Step 6: Apply First Waterproofing Coat
- Choose suitable exterior waterproofing
- Acrylic, elastomeric or silicone-based
- Apply first coat evenly
- Cover entire wall surface
- Ensure good coverage
- Work material into block texture
Step 7: Apply Second Coat
- Wait for first coat to dry
- Apply second coat thoroughly
- Build up waterproofing thickness
- Cover any thin spots
- Ensure complete protection
- Create uniform finish
Step 8: Apply Additional Coats
- Add third coat if recommended
- Achieve specified dry film thickness
- Most systems need 2-3 coats
- Ensure adequate protection
- Follow manufacturer recommendations
- Build up proper waterproofing
Step 9: Protect and Cure
- Let waterproofing cure fully
- Protect from rain during curing
- Avoid damage to fresh coating
- Follow curing time recommendations
- Ensure proper adhesion develops
- Maximum strength achieved
Step 10: Apply Finish Coat
- Apply paint or finish if desired
- Use compatible exterior paint
- Enhance appearance
- Add extra UV protection
- Ensure waterproofing maintained
- Complete professional finish
How Do You Hire a Specialist for Wall Waterproofing?
Search online, contact different contractors, verify the BCA licence, conduct interviews, review quotations, and check online reviews to hire a specialist for wall waterproofing.
Step 1: Research Reputable Companies
- Search online for licensed waterproofing contractors
- Visit company websites like CWP.com.sg
- Check company experience and services offered
- Look for established companies with good reputations
Step 2: Request Multiple Quotations
- Contact at least three different contractors
- Request detailed written quotations
- Compare services and pricing offered
- Ask about materials and methods used
- Check what warranty coverage is included
- Understand payment terms and schedules
Step 3: Check Credentials and Experience
- Verify BCA contractor license in Singapore
- Check professional association memberships
- Ask about years in business
- Review completed project portfolios
- Ensure proper insurance coverage
Step 4: Interview and Assess Contractors
- Schedule consultations with shortlisted companies
- Ask about specific wall waterproofing experience
- Discuss your particular wall problems
- Check communication and responsiveness
- Trust your instincts about reliability
Step 5: Review Quotations Carefully
- Compare scope of work detailed
- Check materials brands and quality
- Understand warranty terms offered
- Look for hidden costs or exclusions
- Choose best value not cheapest price
Step 6: Verify Company Reputation
- Contact provided references
- Check online review platforms
- Look for complaints or problems
- Assess company track record
- Verify they complete projects properly
Step 7: Confirm Contract Details
- Review written contract thoroughly
- Ensure scope clearly defined
- Check timeline and milestones
- Verify payment schedule
- Understand warranty coverage
- Confirm insurance and liability
Step 8: Choose CWP for Professional Service
- CWP offers experienced wall waterproofing
- Quality materials and workmanship
- Comprehensive warranties provided
- Transparent competitive pricing
How Much Does Wall Waterproofing Cost in Singapore?
Wall waterproofing cost in Singapore ranges from SGD $15 to $50 per square metre depending on waterproofing type and wall condition. External wall waterproofing costs SGD $15 to $30 per square metre for standard applications. Internal wall waterproofing costs SGD $20 to $40 per square metre including preparation and materials. Basement wall waterproofing costs SGD $25 to $50 per square metre due to complexity. Bathroom wall waterproofing costs SGD $300 to $800 for complete treatment. Retaining wall waterproofing costs SGD $30 to $60 per square metre for external membranes.
Cementitious wall waterproofing costs SGD $50 to $50. Liquid membrane waterproofing costs SGD $20 to $35 per square metre applied. PU injection crack repairs cost SGD $50 to $200 per metre. Bituminous waterproofing costs SGD $25 to $40 per square metre for basement walls. Acrylic waterproof coatings cost SGD $15 to $30 per square metre for external walls. Sheet membrane systems cost SGD $30 to $50 per square metre installed. Crystalline waterproofing costs SGD $30 to $50 per square metre for concrete walls. Professional installation adds 50% to 100% to material costs but ensures quality lasting results.
How Long Does Wall Waterproofing Last?
Wall waterproofing lasts 10 to 25 years in Singapore depending on type, application quality and environmental exposure. Cementitious wall waterproofing lasts 10 to 15 years with proper application and maintenance. Liquid membrane waterproofing lasts 15 to 20 years on external walls. Bituminous waterproofing lasts 20 to 30 years on basement walls underground. Acrylic wall coatings last 8 to 12 years before needing reapplication. Crystalline waterproofing lasts the lifetime of concrete walls permanently. PU injection seals last 10 to 15 years in wall cracks.
FAQ’s
No, wall putty is not waterproof and only provides a smooth surface for painting. Wall putty fills minor imperfections creating even surfaces but does not block water. It absorbs moisture causing paint peeling and damp problems in wet areas. You must apply proper waterproofing before wall putty in bathrooms and wet areas. Use waterproof putty specifically designed for moisture areas if needed.
Cementitious waterproofing is best for interior walls in bathrooms and wet areas. It bonds strongly to concrete and masonry creating reliable waterproof barriers. Liquid membrane waterproofing also works excellently for internal walls needing flexibility. For non-wet interior walls, acrylic waterproof paint provides adequate moisture protection. Choose waterproofing type based on water exposure level the wall faces.
Yes, you absolutely need to waterproof shower walls before tiling to prevent water damage. Waterproofing creates a barrier stopping water reaching wall structures behind tiles. Without waterproofing, water leaks through causing expensive damage to rooms below. Apply liquid membrane or cementitious waterproofing covering entire shower area completely. Quality shower waterproofing is essential and required by building codes.
Yes, wall waterproofing can stop water seepage and dampness when applied correctly. Proper waterproofing creates barriers blocking water penetration through walls completely. It eliminates damp patches, mould growth and water stains effectively. Different waterproofing types suit different seepage causes and wall conditions. Professional waterproofing diagnosis ensures correct treatment stopping seepage permanently. Quality application provides long-lasting protection against dampness.
Yes, wall waterproofing is suitable and essential for basements and retaining walls. These walls face constant groundwater pressure requiring strong waterproofing systems. Specialized basement waterproofing uses bituminous, crystalline or membrane systems. Retaining walls need external waterproofing on soil-facing sides preventing moisture penetration. Professional basement waterproofing prevents flooding, dampness and structural problems effectively. It is mandatory not optional.
Yes, you can waterproof a painted wall but preparation is crucial for success. Remove loose or flaking paint ensuring good waterproofing adhesion to surface. Clean painted surfaces thoroughly removing all dirt and contaminants completely. Some waterproofing systems need primers on painted surfaces for proper bonding. Acrylic and elastomeric waterproof coatings apply directly over sound painted walls. Professional assessment ensures appropriate waterproofing for painted surfaces.
No, you cannot apply plexibond without cement as it is a bonding agent not standalone coating. Plexibond mixes with cement creating strong adhesive mortars and renders. It improves cement adhesion to surfaces preventing delamination and failure. Always mix plexibond with cement, sand and water as product instructions specify. Using plexibond alone provides no waterproofing or structural benefits whatsoever.
Acrylic sealant is best for internal walls as it is paintable and low-odour. For wet areas like bathrooms, use silicone sealant resisting water and mould. Hybrid polymer sealant works excellently for premium internal applications requiring flexibility. Choose sealant based on joint location, movement and exposure to moisture. Internal wall sealants should be low-VOC for healthy indoor air quality.