
Epoxy floor coating transforms bare concrete into a durable, protective surface. Property owners in Singapore use it to seal floors against moisture, chemicals, and abrasion. It bonds directly to concrete and creates a seamless, long-lasting barrier beneath foot traffic. From residential garages to busy commercial kitchens, this resin system covers a wide range of applications. This guide walks you through everything you need to know before you commit to a project. We cover the advantages, limitations, step-by-step application, maintenance routines, and cost breakdown. Cure times, removal methods, and honest answers to common questions are also included. By the end, you will have the knowledge to make a confident, informed decision.
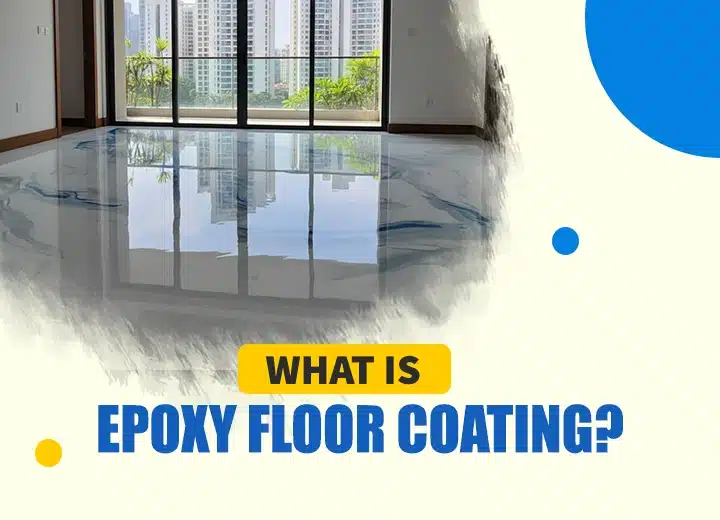
What Is Epoxy Floor Coating?
Epoxy floor coating is a two-part resin system applied directly over prepared concrete. It combines an epoxy resin with a chemical hardener. When you mix the two components, a chemical reaction begins and the material cures rigid. The cured film bonds mechanically to the substrate and resists moisture penetration from above. It also protects against oil spills, cleaning chemicals, and sustained foot or vehicle traffic. In Singapore, installers apply this coating across residential, commercial, and industrial environments every day.
The broader category of floor waterproofing systems includes polyurethane coatings, cementitious membranes, and crystalline treatments. Epoxy floor coating sits within the resin floor family alongside methyl methacrylate and polyaspartic coatings. Within that family, specific subtypes each serve different purposes on site. Self-levelling epoxy suits laboratories, commercial kitchens, and showrooms requiring a smooth, hygienic finish.
Epoxy mortar handles impact-heavy industrial floors that experience sustained heavy vehicle traffic daily. Anti-static epoxy protects sensitive electronic environments from electrostatic discharge during production. Each subtype carries its own technical specification, cure profile, and cost point. Choosing the correct variant at the outset separates a long-lasting installation from a costly failure.
What Are the Advantages and Disadvantages of Epoxy Floor Coating?
Epoxy floor coating offers durability, chemical resistance, and a seamless hygienic surface, but it requires careful surface preparation and can yellow under UV exposure. Review both sides before choosing epoxy floor coating for your property in Singapore.
| Advantages | Disadvantages |
|---|---|
| Bonds firmly to concrete and resists delamination | Requires thorough surface preparation before application |
| Resists moisture, oil, chemicals, and abrasion effectively | Standard grades yellow under prolonged UV exposure |
| Seamless surface is hygienic, non-porous, and easy to clean | Becomes slippery when wet without anti-slip aggregate |
| Service life of 10 to 20 years with regular maintenance | Unsuitable over substrates with active rising damp |
| Available in a wide range of colours, finishes, and textures | Short pot life after mixing; unused material goes to waste |
| More affordable than polished concrete or tile replacement | VOCs during application require proper on-site ventilation |
| Withstands Singapore’s heat and humidity when correctly specified | Professional installation consistently outperforms DIY attempts |
When Should You Use Epoxy Floor Coating?
Epoxy floor coating works best on sound, dry concrete substrates. It suits spaces with high foot traffic, chemical exposure, or water ingress risk. Choose it wherever the floor faces moisture, abrasion, or contamination. Apply it in these environments:
- Garages and car parks exposed to oil, tyre abrasion, and fuel spills
- Commercial kitchens where water and cleaning agents reach the floor constantly
- Warehouses and factory floors under heavy forklift and vehicle traffic
- Hospitals, clinics, and pharmaceutical spaces requiring hygienic, seamless floor surfaces
- Retail showrooms, office lobbies, and reception areas with sustained high footfall
- Residential wet areas, utility rooms, and balconies prone to water pooling
You should choose epoxy floor coating when durability and seamless protection matter most. It acts as a functional floor waterproofing layer in moisture-prone environments. The coating stops water seepage from weakening the concrete substrate beneath. Spaces where hygiene, chemical resistance, and easy cleaning are priorities benefit greatly. Epoxy is a smart investment wherever surface degradation and water ingress combine as risks.
When Should You Not Use Epoxy Floor Coating?
Avoid epoxy floor coating in certain conditions to prevent premature coating failure. SkiAvoid epoxy floor coating on damp slabs, flexible substrates, UV-exposed areas, or surfaces needing fast return to use.
- Floors with active water ingress or rising moisture travelling upward through the slab
- Substrates where relative humidity exceeds 75 percent at the time of application
- Concrete with loose, contaminated, or structurally compromised surface layers
- Areas with sustained temperatures above 60 degrees Celsius on the floor surface
- Outdoor zones with continuous direct sunlight and no UV-stable topcoat in the specification
Installing epoxy over a damp or structurally weak substrate traps moisture beneath the coating. Trapped moisture causes blistering, lifting, and accelerated surface wear over time. Always test the concrete for moisture content and compressive strength first. Address active water ingress and rising damp before you apply any resin system. Choosing the wrong subtype for the environment also leads to early coating failure.
How Do You Apply Epoxy Floor Coating?
Apply epoxy floor coating in six sequential steps: surface preparation, defect repair, priming, component mixing, basecoat application, and topcoat finishing.
Step 1: Inspect and Prepare the Surface
Diamond-grind or shot-blast the slab to open the surface profile for adhesion. Remove oil, grease, existing coatings, and any loose or contaminated material. Aim for a concrete surface profile between CSP 2 and CSP 4. A clean, sound substrate is the single most critical factor in any successful installation.
Step 2: Test the Slab for Moisture
Tape a plastic sheet to the concrete floor and leave it for 24 hours. If condensation forms beneath the plastic, the slab has an active moisture issue. Treat the slab with a moisture-resistant primer or floor waterproofing sealer before proceeding. Skipping this step leads to bubbling, delamination, and adhesion failure later on.
Step 3: Grind or Etch the Concrete Surface
Open the concrete pores using acid etching or diamond grinding to improve adhesion. Diamond grinding is the preferred professional method and delivers a consistent surface profile. Vacuum all residue and allow the concrete surface to dry completely before you coat. Surface preparation is the single most important factor in long-term coating performance.
Step 4: Roll On the Primer Coat
Apply the epoxy primer coat evenly across the prepared concrete using a roller. The primer coat seals the slab and promotes strong bonding for the base coat above. It also reduces outgassing, which prevents air bubbles from rising through the wet epoxy. Follow the manufacturer’s recommended cure time before you apply the next layer on top.
Step 5: Mix and Apply the Base Coat
Mix the liquid resin and hardener at the ratio the manufacturer specifies precisely. Work quickly, as the pot life of mixed epoxy lasts only 30 to 45 minutes. Use a squeegee or roller to spread the base coat across the floor evenly. Broadcast colour flakes or decorative aggregate into the wet coat for a textured finish.
Step 6: Apply the Topcoat for Protection
Once the base coat cures fully, roll on a clear or pigmented protective topcoat. The topcoat adds gloss, UV resistance, and a hard-wearing upper surface layer. Add an anti-slip additive to the topcoat for any wet or high-risk floor area. Allow the full cure time to pass before permitting any foot or vehicle traffic.
How Do You Maintain Epoxy Floor Coating?
Maintain epoxy floor coating by sweeping daily, mopping weekly, addressing spills immediately, inspecting regularly, and recoating every five to ten years. Regular upkeep keeps your waterproof floor barrier fully intact and effective against moisture damage. It prevents surface scratching, staining, and premature adhesion failure over time.
Step 1: Sweep the Floor Daily
Remove grit, dust, and debris from the surface using a soft broom or vacuum. Fine particles act like abrasive paper and gradually wear the coating film down over time. This one daily habit adds years to the working life of the overall system.
Step 2: Mop Weekly with a pH-Neutral Cleaner
Dilute a pH-neutral cleaner in warm water and mop the floor in manageable sections. Avoid acidic, solvent-based, or highly alkaline products as they degrade the epoxy resin binder. Rinse thoroughly after cleaning and allow the surface to dry before traffic returns to normal.
Step 3: Address Spills Immediately
Wipe up chemical spills, oils, or liquids as soon as they occur on the floor. Although epoxy resists chemicals, prolonged exposure to harsh substances damages the surface. Use a clean cloth or mop to remove the spill, then rinse the area thoroughly. Check for surface discolouration or residue after cleaning any heavily affected floor area.
Step 4: Inspect the Coating Regularly
Check the surface every few months for peeling, bubbling, cracking, or visible wear. These are the opposite signs of the durability and adhesion strength you started with. Use an epoxy repair kit for small chips, gouges, or patches of delamination. Prompt repairs prevent further adhesion failure and extend the full life of the coating. A well-maintained epoxy floor system is part of your building’s ongoing upkeep programme.
Step 5: Plan a Recoat Every Five to Ten Years
Budget to recoat your epoxy floor system every five to ten years as needed. Lightly sand the existing topcoat surface to improve adhesion for the fresh layer above. Roll on a new topcoat to restore the floor’s gloss and protective performance. Regular recoating costs far less than removing and replacing the entire epoxy floor system. Polyurethane coatings or acrylic sealers are co-hyponyms to consider for your recoat topcoat layer.
How Do You Remove Epoxy Floor Coating?
To remove epoxy floor coating, score the surface, apply a chemical stripper, scrape off the softened coating, then grind the concrete down to bare slab. This resin floor coating bonds firmly to the substrate, so plan the process carefully. Gather all tools and equipment before you begin the job.
Step 1: Gather Your Equipment and Safety Gear
You will need a floor grinder, diamond grinding discs, and a stiff floor scraper. A chemical epoxy stripper, safety goggles, a respirator, and chemical-resistant gloves are all essential. Clear the workspace of furniture and ensure adequate ventilation throughout the area. Proper safety gear protects you from grinding dust, chemical fumes, and sharp debris.
Step 2: Score the Existing Epoxy Surface
Use a floor grinder or angle grinder to score the epoxy floor sealant surface. Scoring creates grooves that allow chemical strippers to penetrate the coating more effectively. Work in overlapping passes to cover the entire floor area evenly and completely. Keep the grinder moving at all times to avoid gouging the concrete slab below.
Step 3: Apply a Chemical Epoxy Stripper
Apply a solvent-based epoxy chemical stripper evenly across the scored floor surface. Solvent-based strippers work faster than water-based or acrylic-based removal products here. Follow the product instructions for dwell time, typically between 30 and 60 minutes. Ensure the workspace stays well-ventilated throughout to reduce harmful chemical fume build-up.
Step 4: Scrape Off the Softened Coating
Use a floor scraper or stiff-bladed tool to lift the softened epoxy floor coating. Work in manageable sections and collect all residue as you proceed across the floor. Dispose of all scraped material in a sealed waste bag or container promptly. Repeat the stripper application on any thick or stubborn areas of coating that remain.
Step 5: Grind Down to Bare Concrete
Use a diamond floor grinder to remove any remaining epoxy coating residue from the surface. Grind the floor until you expose clean, bare concrete across the entire floor area. This step removes uneven patches and levels the surface for any future floor coating. Vacuum all grinding dust thoroughly before you inspect or recoat the concrete slab.
Step 6: Clean and Inspect the Concrete Slab
Wash the exposed concrete surface with clean water and a stiff-bristle brush. Inspect the slab carefully for any cracks, pitting, or structural surface damage beneath. Repair all defects with a suitable concrete patching compound before you apply a new coat. The floor is now ready for a fresh epoxy system or alternative flooring solution.
How Much Does Epoxy Floor Coating Cost in Singapore?
Epoxy floor coating in Singapore costs between SGD 3 and SGD 12 per square foot, depending on epoxy type, floor size, and surface condition.
Solvent-based and 100% solid epoxy systems attract a higher price per square foot. Decorative finishes such as colour flakes or metallic effects also increase overall project costs. Surface preparation, floor size, number of coats, and slab condition all affect the final price. Anti-slip treatments, custom colours, and extended warranty terms add to the installation cost further. Epoxy floor sealant is more cost-effective than polyurethane coatings or stone tile over time. Always gather at least three detailed quotes from licensed floor coating contractors in Singapore. Compare epoxy grade, scope of work, warranty period, and aftercare terms before you commit.
How Long Does Epoxy Floor Coating Last?
Epoxy floor coating lasts between 5 and 15 years in Singapore, depending on traffic levels, maintenance, and the epoxy system used. High-traffic spaces such as carparks and factories may need recoating far more frequently. Low-traffic residential areas enjoy a longer service life with basic routine upkeep. Regular cleaning, prompt spill management, and periodic recoating all extend the floor’s lifespan. The quality of surface preparation and the number of coats also influence longevity significantly. Choosing a 100% solid epoxy over a water-based system improves long-term durability overall. As part of your building’s lifecycle plan, timely recoating prevents costly full-floor replacement.
How Long Does Epoxy Floor Coating Take to Cure?
Epoxy floor coating allows light foot traffic after 24 to 48 hours and reaches full cure for heavy vehicle use in 5 to 7 days. Heavy vehicle or equipment requires a full cure time of five to seven days. In Singapore’s humid climate, temperature and moisture levels can extend the cure time slightly. Never allow heavy use too early, as this causes surface marks or delamination. Always follow the manufacturer’s pot life, open time, and cure schedule carefully. Proper cure time management ensures your epoxy floor system reaches its full performance strength.
Frequently Asked Questions (FAQ’s)
Epoxy floor coating costs between SGD 3 and SGD 12 per square foot across Singapore. It is generally more cost-effective than tile replacement or polished concrete finishes. Project size and system specification remain the two biggest price-influencing variables.
Yes, epoxy floor coating installation typically costs less than tiling the same floor area. Application is faster and requires fewer materials and labour hours overall. Individual tile replacement is simpler than patching a damaged epoxy coating section later.
Yes, a fully cured epoxy floor coating forms a seamless, non-porous barrier against moisture penetration. It prevents water from reaching the concrete substrate directly beneath the surface film. Always address any active water ingress at the source before you apply the coating system.
Yes, epoxy floor coating suits Singapore’s climate when you specify a moisture-tolerant formulation correctly. Substrate preparation and priming are critical for reliable adhesion in high-humidity conditions. Your contractor should always conduct a moisture content test before any application begins.
Standard epoxy floor coating yellows and breaks down under prolonged direct UV exposure over time. Specify an aliphatic polyurethane topcoat to achieve UV-stable, colour-fast performance on outdoor areas. Most standard systems tolerate surface heat up to 60 degrees Celsius before softening begins.
Poor surface preparation, excessive substrate moisture, incorrect mixing ratios, and high humidity cause most failures. Delamination and blistering follow when moisture becomes trapped beneath the coating film. Selecting the wrong epoxy subtype for the conditions also accelerates premature system failure significantly.
Mould can develop beneath epoxy floor coating if moisture enters through delaminated or damaged areas. A seamless, correctly applied coating prevents moisture from reaching the concrete substrate below. Regular inspection and prompt repair close any pathways that allow moisture to travel underneath.
Yes, you can apply epoxy floor coating directly over sound, dry, and clean existing concrete. Remove all old coatings, contamination, and loose material before the new system goes down. Resolve any active moisture or structural issues in the slab before the application process begins.